Ooni Pizza Tips for a Crisp Crust Every Time
The first time I fired up my Ooni, I burned the crust and left the center raw. My friends still tease me. But after dozens of pies, I learned what works and what wrecks a good pizza.
These ooni pizza tips come from real mistakes in my backyard. You do not need chef skills. You need a simple routine and a little practice. Follow along, and your next pizza night will feel like a win.
Set Up Your Station Before You Light the Oven
A tidy station saves you seconds once sauce hits the dough. Those seconds matter, because moisture starts to sink in fast. Set your oven on a firm table near waist height. Keep everything within easy reach.
Prep every topping before you stretch your first dough ball. Think of your station like a sandwich line, each item waiting in order.
Have these ready:
- Two peels: one cool peel for launching, one metal peel for turning
- A small bowl of semolina for quick dusting
- A dry towel, oven gloves, and an infrared thermometer
- Two plates: one for raw dough, one for cooked pies
This setup keeps raw flour away from your finished slices.
Heat the Stone, Not Only the Air
A hot flame does not mean a ready stone. The stone needs time to store enough heat for a crisp base. Preheat for 20 to 30 minutes before your first launch. Then check the center.
Aim your infrared thermometer at the middle of the stone. Side readings run hotter near the flame, so the center gives you a truer number.
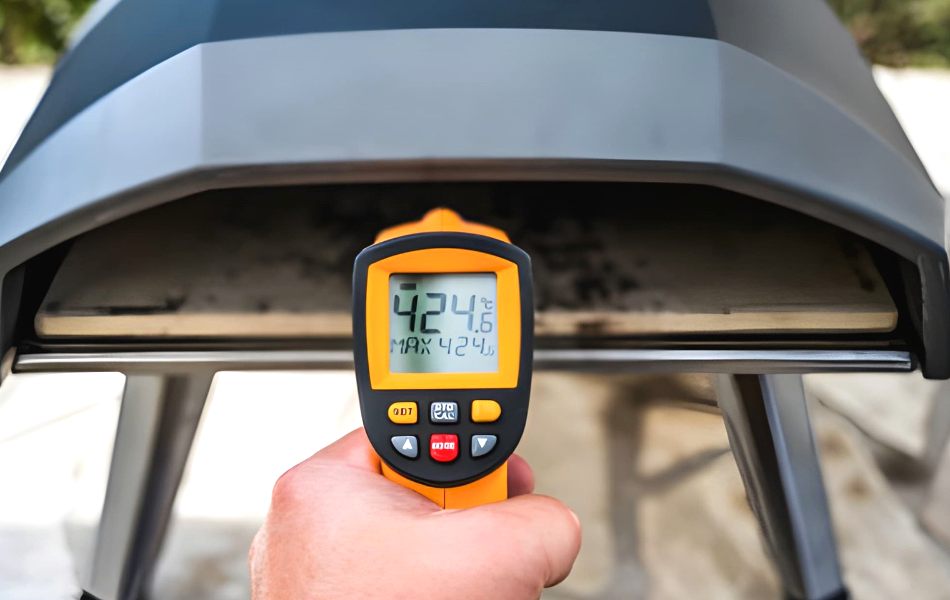
Match your stone heat to your pizza style:
- Neapolitan pies: 750°F to 850°F for a short, blistered bake
- New York style pies: 660°F to 750°F, giving the wider base more time
No thermometer? Drop a pinch of flour on the center. If the flour turns golden in about five seconds, the deck is ready.
A cold stone gives you soggy, pale dough. A hot stone gives you crispy, blistered bottoms.
Build Better Dough
Great pizza starts with great dough. Skip this step, and no oven will save you.
Keep your hydration between 60% and 65% for a beginner-friendly ball. That means 600 to 650 grams of water for every 1000 grams of flour. Higher hydration gives a softer, airier crumb, but wet dough sticks and tears.
Let your dough rest. A slow, cold rise in the fridge for 24 to 48 hours builds deep flavor. Pull it out four to five hours before cooking so it warms to room temperature. Keep each ball covered while it warms, or a dry skin forms.
Pick the Right Flour
Flour choice changes everything. Here is the quick guide I lean on.
| Flour Type | Best For | Protein Level |
|---|---|---|
| Tipo 00 | Neapolitan, soft crust | 11–12% |
| Bread flour | Chewy, sturdy crust | 12–14% |
| All-purpose | Casual weeknight pies | 10–12% |
I love Tipo 00 for high heat. Its fine grind handles intense heat without burning too fast. Bread flour works well when you want more chew and structure.
Stretch, Never Roll
Put the rolling pin away. A rolling pin presses out all the air bubbles you worked to build. Use your hands instead.
Press from the center outward with your fingertips. Leave a narrow rim untouched for a puffy crust. Rotate the dough often as the circle grows.
Lift the dough over your knuckles for the final stretch. Move your hands apart with slow, gentle pressure and let gravity help. Aim for a 10 to 12 inch round. If the dough springs back, let it rest five more minutes.
Keep Toppings Light and Flavor Focused
A loaded pizza looks generous before baking. Inside a hot oven, heavy toppings release water fast. Too much sauce weighs down the center and stops your crust from crisping. A light hand gives your base room to rise.
Here are my go-to amounts for a 12-inch pie.
| Ingredient | Preparation | Amount |
|---|---|---|
| Tomato sauce | Drained, spread thin | 3 tablespoons |
| Mozzarella | Low-moisture or drained, patted dry | 3 ounces |
| Dry toppings | Small pieces, spaced out | 4 to 6 |
| Fresh basil | Added after baking | 3 leaves |
Drain fresh mozzarella for at least 30 minutes, then pat each piece dry. Wet cheese floods the pizza and leaves puddles. Cook mushrooms or sausage ahead of time and cool them fully. Wet toppings turn the center soft before the base finishes.
Master the Peel and Launch
The launch scares most beginners. One bad slide, and your pizza folds into a calzone you never wanted. A little semolina fixes this.
Dust the peel lightly, then spread the grains with your palm. The coarse grains work like tiny ball bearings under the base. Too much semolina burns and leaves a bitter taste, so use a thin veil.
Build your pizza fast on the peel. The longer it sits, the more it sticks. Aim to top and launch within one minute. Then give the peel a shake. If the dough moves freely, you are ready.
For a stuck spot, lift one edge and blow gently underneath. Air spreads flour under the base and loosens the sticky area.
The confident slide: Angle the peel slightly downward near the back of the stone. Use one short forward motion, then pull the peel straight back. The pizza stays while the peel slips away. Commit to the move, because hesitation causes folds and spills.
Manage Your Flame
Flame control separates good pies from great ones. Too high, and your toppings burn before the base cooks. Too low, and nothing crisps.
For gas Ooni models, start on high to preheat. Drop the flame to medium once the top colors too quickly. The stored stone heat keeps cooking the base while the top settles. Raise the flame again between pies.
With wood or charcoal, feed small pieces often. A steady rolling flame across the roof gives even heat. Big roaring flames scorch the tops in seconds. Patience with the flame pays off every time.
Turn Early for an Even Crust
The flame side cooks faster than the oven opening. Watch the rim after launch. Once the back edge rises and gains color, start turning.
Rotate the pizza every 20 to 30 seconds with your metal turning peel. Give it a quarter turn each time. Small turns give you better control than one big spin.
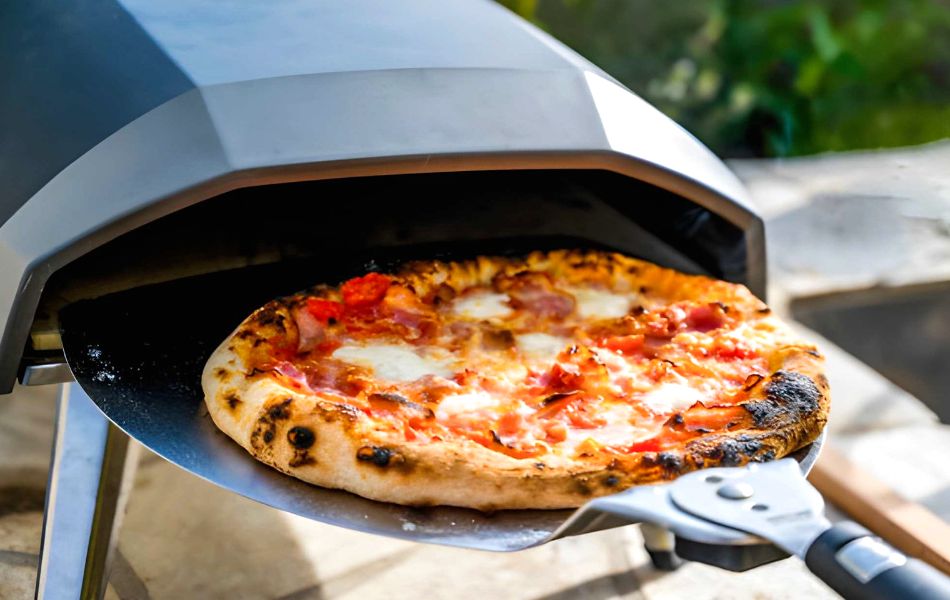
Most Ooni ovens bake a pie in 60 to 90 seconds at high heat. Your eyes matter more than a timer. Look for dark leopard spots, bubbling cheese, and a firm underside. Do not walk away, since a distracted minute means a burnt dinner.
Give the Stone Time Between Pizzas
Each pizza pulls heat from the stone. A second pie launched too soon gets a pale center. Let the oven recover for about five minutes before the next round.
Check the center with your thermometer again. Aim for the same range you used on the first pie. Cold or windy weather stretches recovery time, so keep dough covered while the oven reheats.
Use recovery time to top the next base. Avoid shaping several pies far ahead. Resting dough grows sticky once sauce and cheese arrive. One pizza at a time gives you cleaner launches.
Fix Common Ooni Problems
Even seasoned cooks hit snags. Here are quick fixes for the issues I see most.
- Pale, soft bottom: The stone ran cool. Preheat longer and check the center before launching.
- Burnt top, soft base: Flame heat outran stone heat. Lower the flame after launch and give a longer preheat next round.
- Pizza stuck to the peel: Warm dough or too much sauce. Use a cool peel, work faster, and add semolina under sticky spots.
- Bitter base: Burnt flour. Use less dusting flour and brush loose ash between bakes.
- Uneven cooking: You forgot to rotate. Turn more often and watch the flame side.
- Torn center: Pinch small holes closed before saucing. Fold larger tears into a calzone. My ugliest rescue pie once became the first empty plate.
If wind steals heat from your oven, turn the back toward the wind. This holds warmth inside the metal shell.
Finish Each Pizza After Baking
High heat gives you char, but finishing touches give you personality. Add fresh ingredients after the pie leaves the flame, so their flavor stays bright.
Try these easy finishes:
- A drizzle of good olive oil, which the heat wakes up beautifully
- Torn basil leaves for fresh color and scent
- A pinch of flaky salt on the crust rim for crunch
- Grated hard cheese for a salty, nutty top
- Hot honey over pepperoni, sausage, or roasted peppers
Brush the warm crust with garlic oil mixed with parsley. The rim pulls in the aroma like fresh bread near butter. Rest each pizza for one minute before slicing, then cut with one firm pass of a sharp wheel.
Clean and Store Without Water
Let heat handle most of the cleanup. Run the oven hot until cheese and sauce turn to dry ash. Cool the stone fully before you touch it. Never pour water on a hot stone, or the surface cracks.
Brush off raised debris with a stiff brush or scraper. Keep soap and water away, since the porous stone soaks up liquid and flavor. Dark marks are normal signs of a seasoned stone, so leave them be.
Store your oven under a fitted cover after it cools. Keep the stone dry during damp weather. A quick wipe-down keeps your gear working for years.
See Also – Pizza, Health, and Your Kitchen
Your Best Pizza Comes From Repetition
Nobody nails their first pizza. My early attempts looked sad and lumpy. But each pie taught me something new.
Heat the stone, relax the dough, top lightly, and test the peel. Turn early, then let the stone recover. Those steps solve most pizza troubles and give you a strong head start.
Write down your stone temperatures and baking times. Small notes build strong instincts fast. Serve the odd shapes with pride, because a folded edge often becomes the favorite bite.
Fire up your oven this weekend. Invite a friend, pour a drink, and make pizza together. The best pizza comes from your own hands and a hot stone waiting for dough.